Who this is for
Workday Recruiting admins who need job-level custom fields in Tenzo from a Workday Custom Report as JSON. Skip this if jobs already show the right fields without a report.What you are setting up
- A Custom Report (jobs / requisitions, JSON-capable).
- A user who can run it with HTTP Basic auth.
- That report URL, username, and password in Tenzo (ATS integration dynamic settings).
Before you start
- Workday access to create/edit Custom Reports and the fields you need.
- An account allowed to run the report with basic auth (integration / ISU user).
- Tenzo org admin access to edit the Workday integration.
Part 1 — Workday: build the report
Menus vary by tenant; match names to your environment.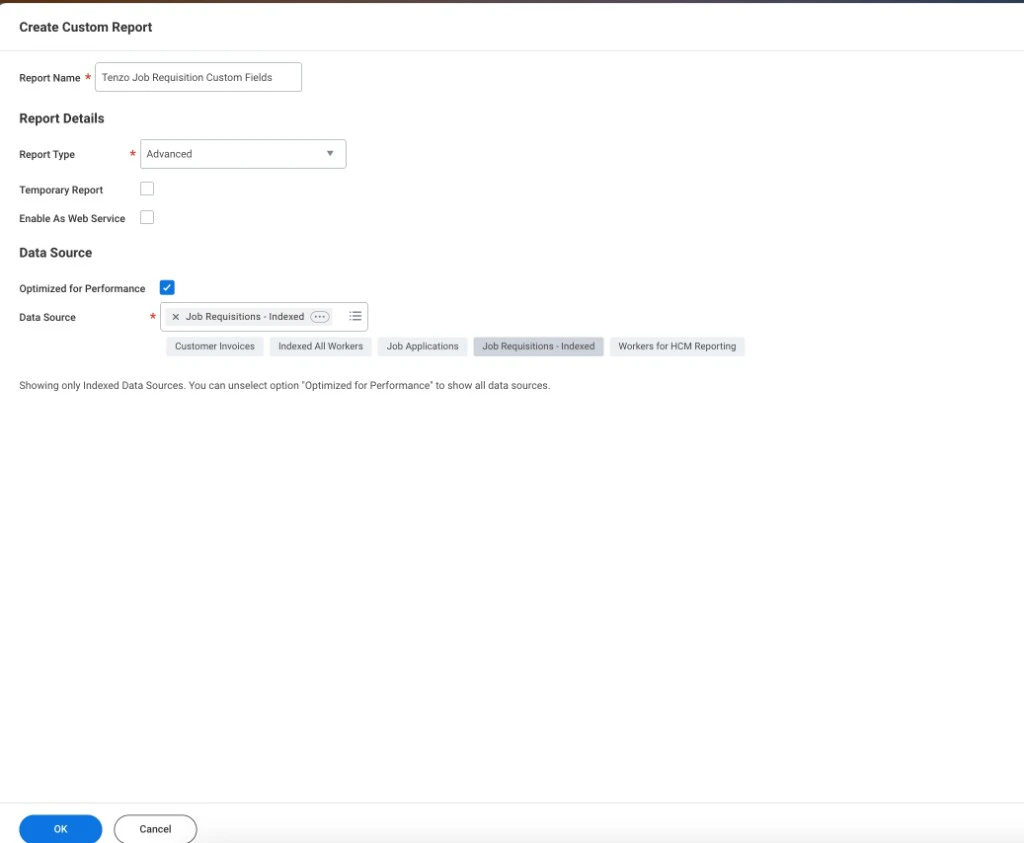
Create Custom Report may show Enable As Web Service off at first. Turn it on on the report Advanced tab (below). The integration user may need Share to run the report.
- Open Create Custom Report. Set a clear Report name (e.g. Tenzo Job Requisition Custom Fields).
- Report type: Advanced unless your partner says otherwise.
- Data source: Job Requisitions - Indexed (recommended; enable Optimized for performance). For other sources, you can uncheck Optimized for performance to see more options (per Workday’s note).
- In Columns, add:
- The job / requisition id Tenzo already uses (e.g.
R-00433or your integration’s reference). - Each custom field that should appear on the job in Tenzo.
- The job / requisition id Tenzo already uses (e.g.
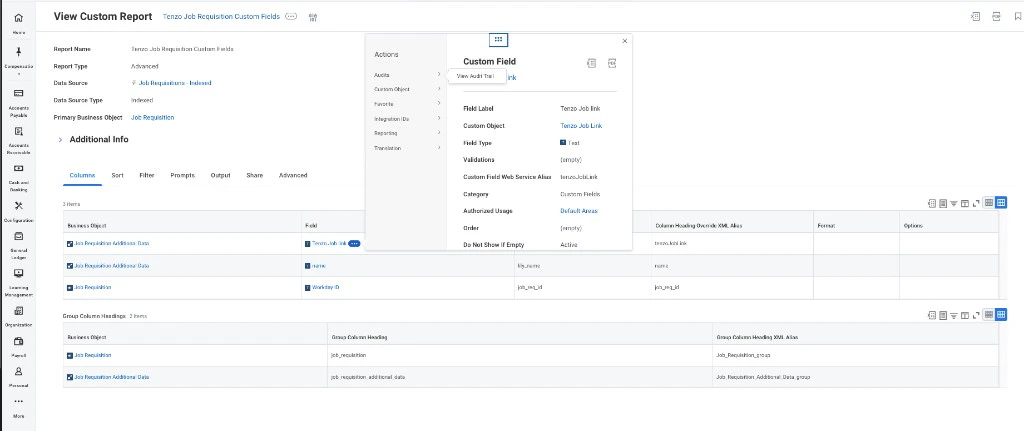
XML alias and Web Service alias
JSON keys (and Tenzo Job ID key / mapping) follow the column’s web service exposure. Column Heading Override XML Alias must exactly match Custom Field Web Service Alias (case-sensitive).- On the custom field definition, note Custom Field Web Service Alias (example:
tenzo_job_link). - In the report Columns row for that field, set Column Heading Override XML Alias to the same string.
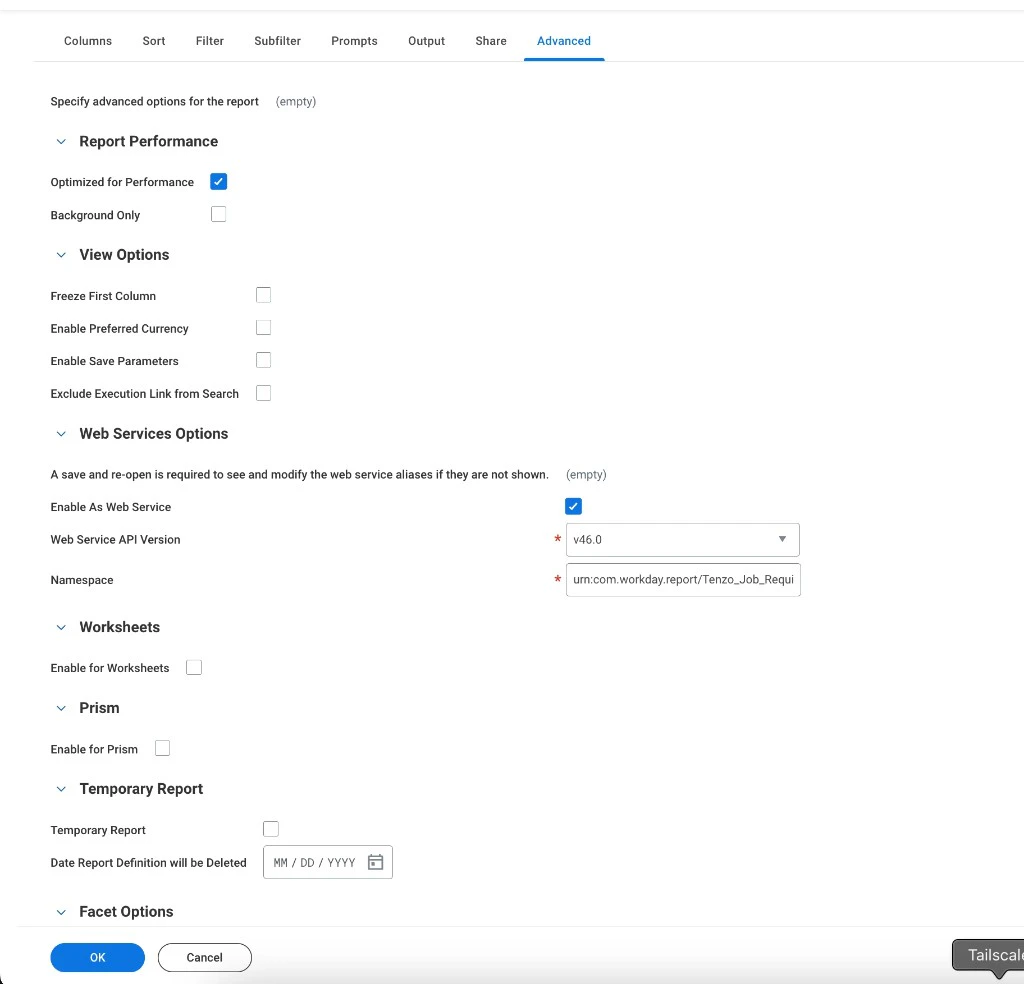
Advanced: Web Services for Tenzo
Open the Advanced tab. For an external JSON URL in Tenzo:| Setting | Use |
|---|---|
| Enable As Web Service | On — required. Off → Test connection often fails or returns non-JSON. |
| Web Service API Version | Tenant-supported value (e.g. v46.0) per your admin/docs. |
| Namespace | Usually auto-filled (urn:com.workday.report/...). Change only if Workday says so. |
- Run the report in Workday: one row per job, identifier column matches Tenzo.
- JSON URL (web service link, not the generic report screen):
- View Custom Report → Related Actions (⋯) → Actions → Web Service → View URLs.
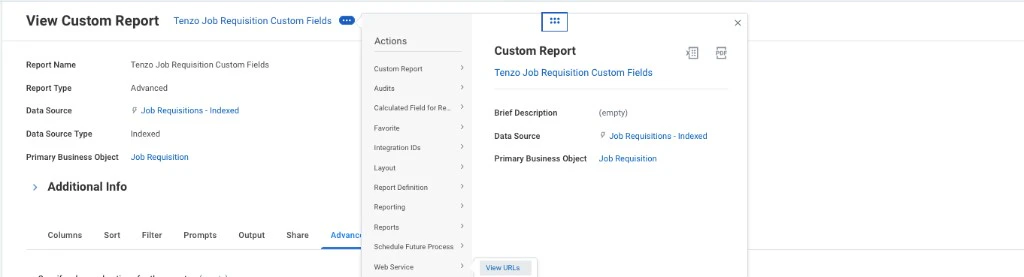
- On View URLs Web Service, JSON row → right-click the blue link → Copy URL → paste in Tenzo as Workday Job Custom Field Report URL.
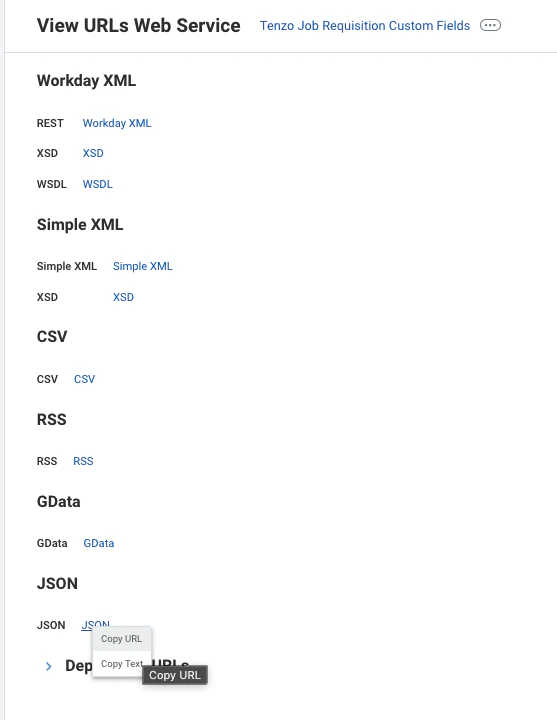
https:// URL including query params so Test connection gets JSON with Report_Entry. Treat the URL like a secret.
Part 2 — Workday: integration user
- Use or create a user who can run this report.
- Confirm HTTP Basic is allowed for that endpoint (not SSO-only), like Postman would use.
Part 3 — Tenzo: connect the report
- Sign in as organization administrator.
- Admin → ATS Integrations → Workday → Configuration (or your tenant’s equivalent).
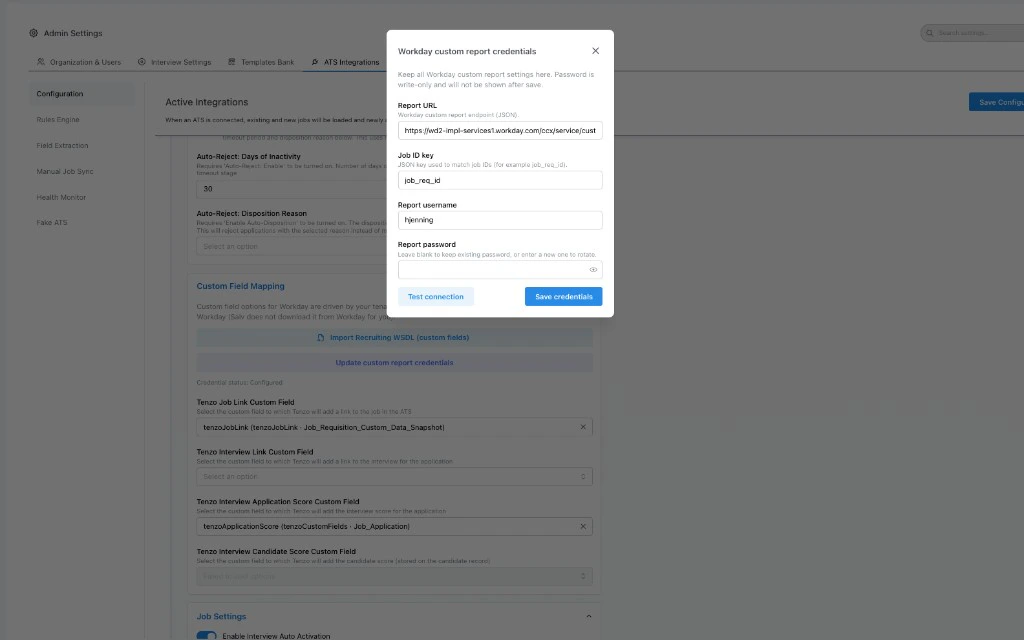
- In Custom Field Mapping / Custom fields, open Update custom report credentials (modal below).
-
Fill the modal:
- Report URL — JSON URL from Workday.
https://only; no user/password in the URL. Max 4096 characters. - Job ID key — JSON property for the job id on each
Report_Entry(oftenjob_req_id). Must match Workday output exactly (case-sensitive). - Report username / Report password — Part 2 user. Password is write-only after save; use leave blank to keep existing password when only changing URL or key.
- Report URL — JSON URL from Workday.
-
Test connection — expects JSON with
Report_Entry; with Job ID key, checks that at least one row has that property. - Save credentials. Credential status may show Configured.
Verify in Tenzo
Open a job that’s in the report; confirm custom values after sync/refresh. If empty, compare report JSON id to Tenzo’s job code/id for the same Job ID key.Common issues
| Issue | Try |
|---|---|
| Test fails | Wrong password, user can’t run report, or URL isn’t the JSON URL. Postman + same URL + basic auth. |
| Fields empty | No row for that job’s id, or Job ID key ≠ JSON property name (case-sensitive). |
| Wrong JSON keys | Column Heading Override XML Alias must match Custom Field Web Service Alias (see XML alias and Web Service alias). |
| URL rejected | https, normal public hostname; internal/metadata hosts blocked. Shorten if over 4096 characters. |
Related
- Workday ATS setup — overall Workday order in Tenzo.
- Custom fields (WSDL) — writes; this report is for reading extra job values.